

Welcome to the world where precision meets versatility! In this guide, we’ll embark on an exciting journey of effortless Cricut cuts using your Silhouette machine. While the Cricut is celebrated for its intricate designs, the Silhouette brings its own set of capabilities to the table, offering a seamless crafting experience. Join us as we explore how to leverage the power of your Silhouette to achieve flawless cuts on Cricut designs, opening up a world of endless possibilities for your creative projects. Whether you’re a seasoned crafter looking to streamline your process or a novice eager to explore new crafting techniques, this guide is your gateway to effortless Cricut cuts with the help of your trusty Silhouette machine. Let’s dive in and discover the magic of this crafting fusion together!
Contents
Setting Up Your Silhouette Cameo 3
Unboxing
Upon receiving your Silhouette Cameo 3, unpack the standard box which includes essential items such as the wireless cutting machine, Silhouette Studio Software, power and USB cables, a 12×12 inch cutting mat, the AutoBlade, a one-month basic subscription to the Silhouette Design Store, a vinyl crosscutter, and 100 digital designs.
Installing Silhouette Studio Software
Begin by connecting your machine to your computer via the cord or Bluetooth. Then, visit Silhouette’s website to download and install the latest version of the Silhouette Studio software tailored to your computer’s specifications. Follow the on-screen prompts for a seamless installation process.
Connecting Your Machine
Once Silhouette Studio software is installed, connect your Cameo 3 to the software. Simply plug in the USB cable or activate Bluetooth mode by pressing the Bluetooth button on the machine’s front panel.
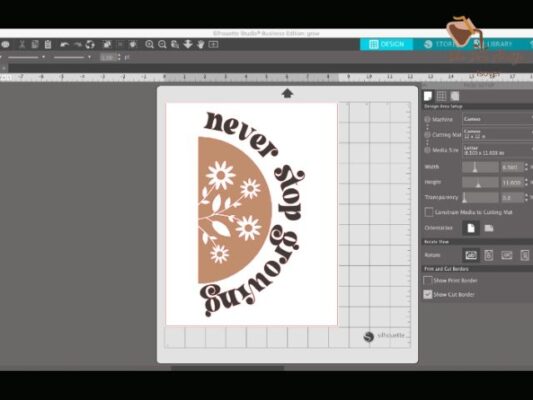
Familiarizing Yourself with Silhouette Studio
Silhouette Studio serves as your creative hub for designing and cutting projects. Upon opening the software, you’ll encounter the Home Screen, granting access to essential features like the Menu, Cut Settings, and the Toolbar.
Designing in Silhouette Studio
Create custom designs using Silhouette Studio’s drawing tools or import designs from external programs like Adobe Illustrator or CorelDRAW. Alternatively, explore pre-made designs available in the Silhouette Design Store.

Adjusting Cut Settings
Prior to cutting, fine-tune your cut settings by adjusting parameters such as blade depth, speed, and material thickness to ensure optimal results.
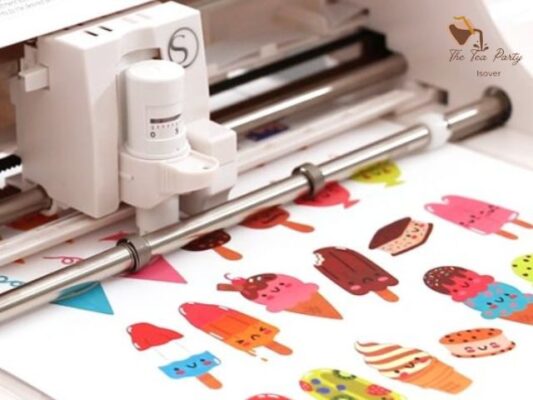
Printing and Cutting
Utilize the Print & Cut feature by designing your project in Silhouette Studio, printing it, and then loading it into your Cameo 3 for precise cutting.
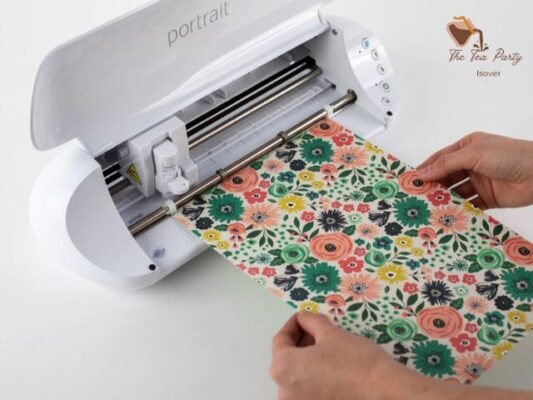
Preparing Your Cameo 3 for Cutting
Preparing the Cutting Mat
Ensure a smooth cutting process by properly preparing the cutting mat. Remove the protective cover, place it on a flat surface, and align your material, ensuring it’s free of wrinkles or bubbles.
Blade Preparation
Insert either the AutoBlade or ratchet blade into the blade holder and adjust the blade depth accordingly.
Utilizing the Dual Carriage
Maximize efficiency with the Cameo 3’s dual-carriage feature, allowing simultaneous use of two tools for versatile crafting options.
Adjusting Rollers
Position the rollers to securely hold the cutting mat in place, ensuring precise cuts.
Leveraging My Library and Silhouette Design Store
My Library
Organize your designs in My Library, where you can create folders and subfolders for easy access and management.
Exploring Silhouette Design Store
Browse through a plethora of designs in the Silhouette Design Store, where you can purchase and download designs to enhance your crafting projects.
Conclusion
The Silhouette Cameo 3 emerges as a powerhouse cutting machine, offering unmatched versatility and precision for crafting enthusiasts. This guide has equipped you with the essential knowledge needed to embark on your journey with the Cameo 3, from setup to navigating Silhouette Studio and preparing your machine for cutting. With its myriad features and capabilities, the Silhouette Cameo 3 opens doors to endless creative possibilities, empowering you to bring your crafting visions to life with ease and precision.
Related Post
Design Evolution: 3D Printed Embossing Plate
From Vector to Reality: 3D Printed From SVG Designs
Top 10 Styles Anime Room Decor Ideas